We hope you love the products we recommend! Just so you know, Trendy Mami may collect a share of sales or other compensations from the links on this page.
–
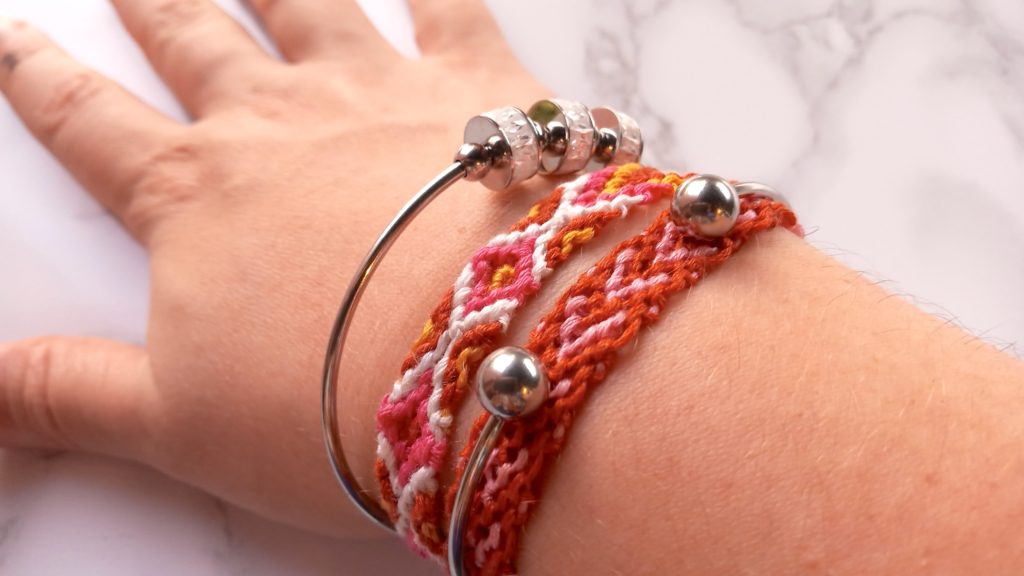
If you’ve ever wondered, “how do you make friendship bracelets?”, then you’re on the right page. We have 2 easy tutorials to make either a heart friendship bracelet or a diamond friendship bracelet in just a few minutes.
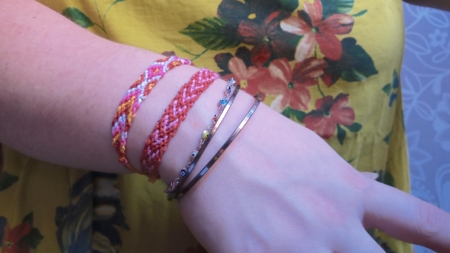
Make one of these DIY friendship bracelet patterns for you and give the other to your BFF!
How Do You Make Friendship Bracelets? A Guide
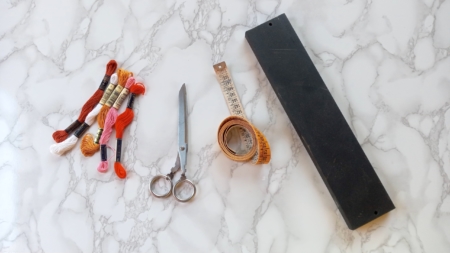
Materials
- Embroidery floss (2 colors for heart bracelet, 4 colors for diamond bracelet)
- A pair of scissors
- Measuring tape
- Heavy base or a clipboard
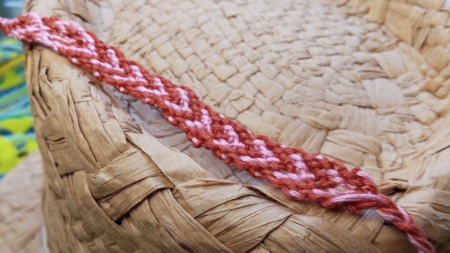
Instructions for the Heart Bracelet
- To learn “how do you make friendship bracelets for your bestie?” start here: take 1 color of embroidery floss and cut 2 strands 40-47 inches (100-120cm) long. Measure and cut 2 more strands in the other color of embroidery floss.
- Take all 4 strands and fold them in half. At the half point, make a knotted loop. Now, you should have 8 strands.
- Place something heavy on top of the knot loop to keep it in place while you braid.
- Separate each strand so that the colors alternate.
Beginning the Pattern
- We will start by making a chevron pattern. Take the furthest strand on the left and create a “4” shape over the next strand.
- Pass the end under the strand and pull through to make a forward hitch.
- Repeat again (create a “4” shape and pull through). This makes a forward knot.
- Make a forward knot using the 2nd and 3rd strands and then the 3rd and 4th strands. Stop after the 4th strand.
- Now we will do the same but start with the furthest right strand. This will create a backward hitch and a backward knot. Stop once you reach the middle.
- Take the two middle strands and make a forward hitch with the left strand and then a backward hitch. This is now called a forward-backward knot.
- Repeat steps 5 to 9 to create the 2nd row. But this time, create a backward hitch first and then a forward hitch with the two middle strands. This is a backward-forward knot.
Completing the Bracelet
- For the 3rd row, start with the 2nd strand from the left and make a backward knot on the 1st strand. Move the 2nd strand to the side.
- Use the 1st thread to make forward knots on the rest of the strands.
- Now make a forward knot with the furthest 2 right strands.
- Similar to steps 12 and 13, you’ll need to move the 2nd furthest strand aside to make a backward knot on the rest of the strands.
- Make a forward-backward knot with the two middle strands. Then a backward hitch and a forward hitch.
- Repeat steps 12 to 16 to make the 4th.
- For the 5th row, leave the 1st strand. Use the 2nd and 3rd strands to create a forward knot. Repeat until the last strand on the left.
- Repeat the same but on the right side, creating backward knots.
- Create a forward-backward knot with the 2 middle strands.
- You’ll need to repeat this entire sequence until you have your desired bracelet length. For a 4-inch (10 cm) bracelet, you’ll have 26 rows.
Wrapping It Up
When you’re done, secure it with a knot (which will be used as the button). Cut off any excess thread. Give one bracelet to your bestie! Even better, show them this tutorial to teach them the answer to the question, “how do you make friendship bracelets?”
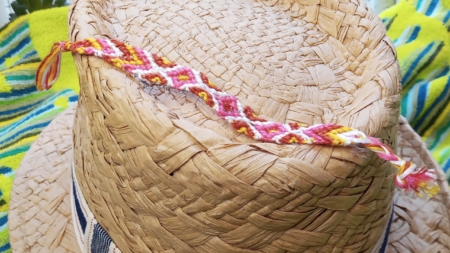
Instructions for the Diamond Bracelet
- How do you make friendship bracelets in a diamond shape? Start by cutting 1 strand 40-47 inches (100-120cm) long for each color of embroidery floss.
- Take all 4 strands and fold them in half. At the half point, make a knotted loop. Now you should have 8 strands.
- Place something heavy on top of the knot loop to keep it in place while you braid.
- Separate each strand from the other, so the colors mirror each other from left to right.
Beginning the Pattern
- For the 1st row, we’ll make a chevron pattern as we did for the heart bracelet. Take the furthest strand on the left and create a “4” shape over the next strand.
- Pass the end under the strand and pull through to make a forward hitch.
- Repeat again (create a “4” shape and pull through). This makes a forward knot.
- Make a forward knot using the 2nd and 3rd strands and then the 3rd and 4th strands. Stop after the 4th strand.
- Now we will do the same but start with the furthest right strand. This will create a backward hitch and a backward knot. Stop once you reach the middle.
- Take the 2 middle strands and make a backward hitch and then a forward hitch to create a backward-forward knot.
Completing the Bracelet
- Continue steps 5 to 10 for rows 2 to 8.
- To close the chevron pattern, make a forward knot with the 1st strand on the left. Then repeat with the 3rd strand.
- The strings are now arranged in a different order. So, take the 1st strand on the left and create a forward hitch and then a backward hitch (to create a forward-backward knot).
- Repeat on the other side.
- To make a diamond, take the 1st strand on the left and make a backward knot on the other strands until you reach the 1st one on the left.
- Repeat on the other side, but with forward knots.
- Tie the middle strands together with a backward-forward knot (this is the center of the diamond).
- Take the strand to the left of the middle strands and create a backward knot on each strand until you reach the 1st one on the left.
- Repeat on the other side but with forward knots.
Wrapping It Up
Continue this pattern until you have your desired bracelet length! Braid the ends together, tie a double knot for the button, and cut the excess threads. Now you know how to make a friendship bracelet!
Make More DIY Bestie Gifts!
How do you make friendship bracelets for your bestie, and why should you do it? There are many reasons you should create unique pieces of jewelry for you and your bestie to wear. DIY accessories allow you to show off your friendship and give you one-of-a-kind accessories. If you’re looking for more DIY projects, check out our tutorials to make flower candles, a crochet purse, or even a kissable lip scrub!