We hope you love the products we recommend! Just so you know, Trendy Mami may collect a share of sales or other compensations from the links on this page.
–
When you think of Halloween, easy Halloween costumes and the best Halloween candy are most likely the first things that come to mind. But why not go the extra mile and also get creative with DIY Halloween decorations to spookify for your home? Our DIY Halloween candle decorations will ensure that there is a spooky surprise around every corner of your house!
The great thing about these crafts is that most of these products can be found at Target. I don’t know about you, but I can easily get lost in the Target aisles, especially during Halloween when they have so many wonderful Halloween decor and craft items!
Are you planning to have a Halloween party for friends and family? Make your house unique and festive this Halloween with this DIY Halloween decor. Need to send out invitations? Canva is a free design tool where you can create Halloween-themed invitations, complete with photos, graphics, and more!
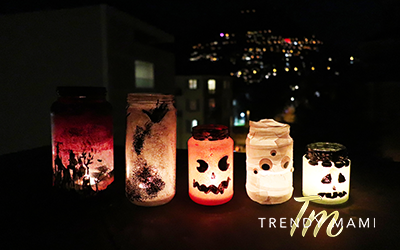
Get ready to become the ghostess with the mostess and treat your house with this Halloween candle DIY. This is a kid-friendly craft activity, so get the kids involved and let’s get into the DIY Halloween lanterns tutorial!
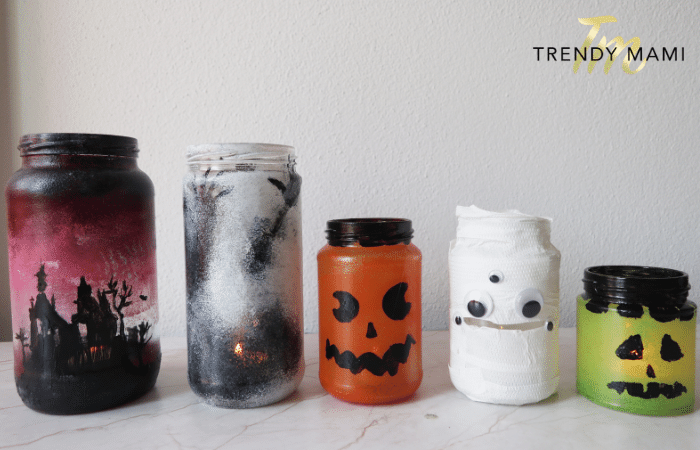
5 DIY Halloween Lanterns Decoration
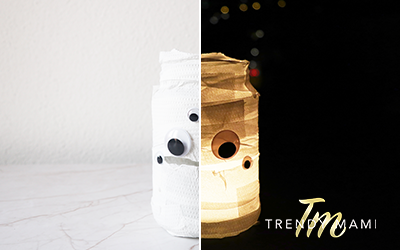
1. Mummy Monster Design
 Materials:
- Mason jar
- Kitchen paper/toilet paper
- Glue stick
- Googly eyes
- Hot glue
- Tealight candle
Luckily you can find most of these items at your local Dollar Tree store. Dollar Tree has a wide selection of affordable craft items, paper, and tealight candles. They also have many school supply items, such as glue sticks and markers to help make these lanterns even better! 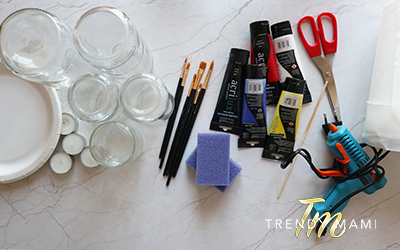
Instructions:
Step 1. Take your kitchen paper/toilet paper and cut it into pieces approx. 1″ wide.
Step 2. Take your Mason jar and a glue stick and begin gluing down your pieces of kitchen paper/toilet paper. Be sure to cover the majority of your jar with kitchen paper/toilet paper.
Step 3. Proceed to stick googly eyes on your jar, creating your Mummy Monster.
Step 4. Take hot glue and glue your tealight candle like this one from Target, onto the bottom of your Mason jar.
Step 5. Light your candle and voila! Your very own Mummy Monster lantern.

2. Jack-O’-Lantern Design
 Materials:
- Mason jar
- Paper plate
- Acrylic paint
- Sponge
- Round brush
- Flat brush
- Hot glue
- Tealight candle
Instructions:
Step 1. Use this acrylic paint set from Target to create a beautiful rich orange color for our jack-o’-lantern design.
Step 2. Take a sponge to pick up the paint from your paper plate and begin to lightly paint your Mason jar.
Step 3. Once your orange paint has dried down, take black paint and a round brush and begin to paint your jack-o’-lantern face.
Step 4. Take a flat brush and paint the rim of the jar black also.
Step 5. Let it dry completely.
Step 6. Take hot glue and glue your tealight candle onto the bottom of your Mason jar.
Step 7. Light your candle and voila! Your very own Jack-O’-Lantern jar.
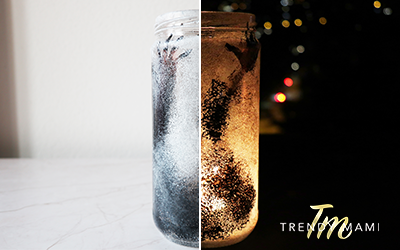
3. Creepy Shadows Design
 Materials:
- Mason jar
- Template print
- Black marker
- Paper plate
- Acrylic paint
- Round brush
- Sponge
- Hot glue
- Tealight candle
Instructions:
Step 1. Roll up your Halloween template print and place it inside your Mason jar. We will trace the design onto the jar.
Step 2. Taking a black marker, proceed to trace the design onto the jar.
Step 3. Take a paper plate, black acrylic paint, and a round brush and proceed to fill in the design.
Step 4. Let your jar dry.
Step 5. Take a sponge and begin to paint over the jar completely with a mix of white and black paint. However, be sure to paint lightly over our black design.
Step 6. Let it dry completely.
Step 7. Take hot glue and glue your tealight candle onto the bottom of your Mason jar.
Step 8. Light your candle and voila! Your very own Creepy Shadows jar.
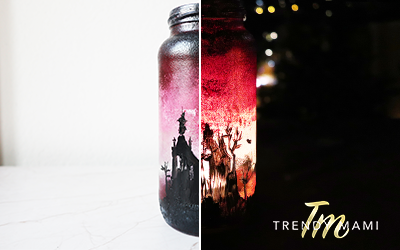
4. Haunted Castle Design
 Materials:
- Mason jar
- Paper plate
- Acrylic paint
- Sponge
- Flat brush
- Black marker
- Round brush
- Hot glue
- Tealight candle
Instructions:
Step 1. Take your acrylic paint on a paper plate and begin to sponge this onto your Mason jar.
Step 2. Let this dry completely.
Step 3. Take your marker and trace your design onto your jar.
Step 4. Take a flat brush and black paint and proceed to fill in your design.
Step 5. Using a round brush, paint in the finer details.
Step 6. Let it dry completely.
Step 7. Take hot glue and glue your tealight candle onto the bottom of your Mason jar.
Step 8. Light your candle and voila! Your very own Haunted Castle lantern.
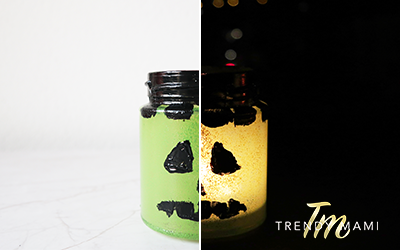
5. Frankenstein Design
 Materials:
- Mason jar
- Paper plate
- Sponge
- Flat brush
- Acrylic paint
- Hot glue
- Tealight candle
Instructions:
Step 1. Take a green acrylic paint on a paper plate, or make your own using blue and yellow paint, and proceed to sponge onto your Mason jar.
Step 2. Let this dry.
Step 3. Take a flat brush and black acrylic paint and paint your Frankenstein face and hair onto your Mason jar. Be sure to paint the rim of your jar too.
Step 4. Let it dry completely.
Step 5. Take hot glue and glue your tealight candle onto the bottom of your Mason jar.
Step 6. Light your candle and voila! Your very own Frankenstein lantern.
Create Your Own
We hope you enjoyed this tutorial on these DIY Halloween candle decorations to creep up your home this Halloween season. If you did enjoy this DIY Halloween lanterns tutorial, check out our Halloween Cloud Bread Recipe – Video Tutorial Included and our Healthy Halloween Treats That Are Keto/Paleo Friendly – Video Included.