
We hope you love the products we recommend! Just so you know, Trendy Mami may collect a share of sales or other compensations from the links on this page.
–
The Halloween season is upon us, which means it’s time to break out the spooky decor! Instead of buying a bunch of new Halloween decorations, it could be very fun (and cost-effective), to make your own! This Halloween pumpkin origami lantern tutorial is a great DIY to make yourself that can be staged in any section of your home! Place it on the side table in your living room, or stage it next to the candy bowl for Halloween night!
Halloween Pumpkin Lantern Origami Tutorial
But if you’re really feeling up to it for the Halloween spirit, you’ll want a good spooky story alongside your DIY project. Follow our video tutorial below for the Halloween pumpkin lantern and listen to a few spooky Halloween stories that will surely have your skin crawling! Or if you just want to dive straight into the pumpkin lantern, see our instructions below!
You will need:
- Tissue paper or regular orange paper
- White paper
- Tape
- Scissors
- Thread and needle
- Ruler
- Black marker
- Lights
- Twine
- A small round hole puncher
Luckily you can find most of these items at your local Dollar Tree store. Dollar Tree has a wide selection of affordable craft items, paper, school supplies that can all be used to make these lanterns. While you’re there, grab some Halloween candy to snack on while you get crafty!
Instruction to Make Halloween Pumpkin Lantern
Grab your scissors, tissue paper, and your favorite Halloween candy, and let’s get started!
Forming the Tissue Paper
- Cut the paper into 8.6 x26.4 cm
- Draw 22 vertical lines on the longer side 1.1cm from each other
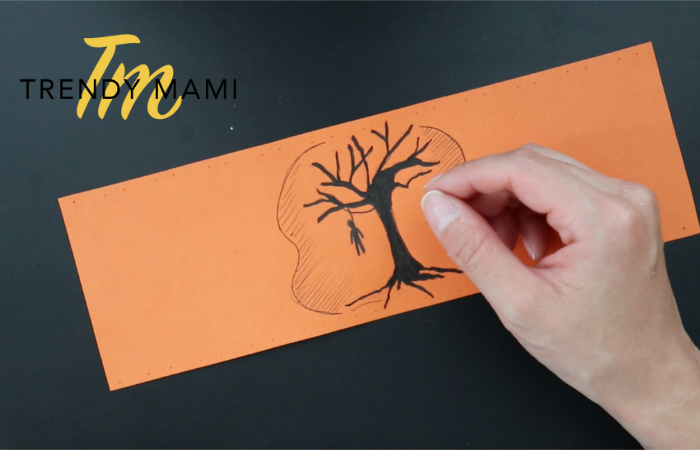
- Draw the figurine you want to be displayed on the lantern in the center of the paper
- Divide the short side in half to start marking the diagonal lines
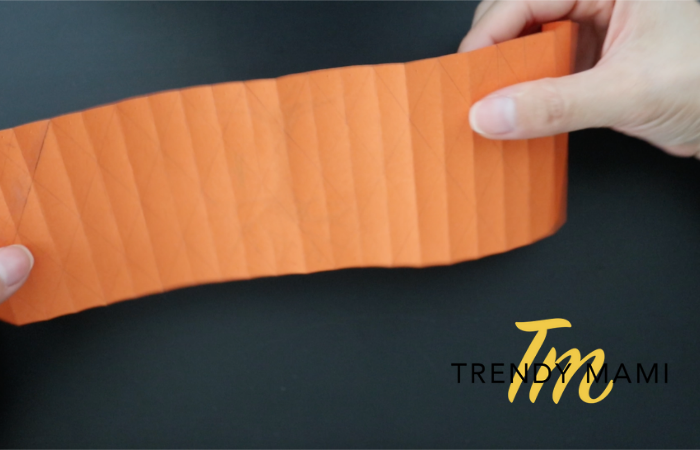
- To create the diagonal pattern, connect the top end of the first vertical line to the bottom end of the second vertical and vice versa. The result should look something like this:

- Repeat this throughout the tissue paper

- Now punch the holes along the longer sides then draw the figurine you want to be displayed on the lantern
- Form the diagonals, and fold the sheet in the opposite direction (folding “mountain”, in relief)
- Form the sheet into a cylinder with strips with double-sided tape

- Use twine and thread to form holes and loop through with the needles around the bottom of the cylinder sheet, and finally pull to close the bottom of the lantern
- Use double-sided tape to hold the light inside the lantern
- Then, repeat step 10, but this time for the top end of the lantern
- And this is it! If you want to make these lanterns smaller or bigger, either divide the dimensions in half or double the original proportions.

More Halloween DIY Projects
That’s all for the Halloween origami lanterns, but we have plenty more spooky crafts! Need a quick look to put together for your kid’s Halloween costumes? Or maybe you want to to do some Halloween DIYs that your kids can even join in on! We have endless Halloween DIY projects, recipes, and more to celebrate the season!