We hope you love the products we recommend! Just so you know, Trendy Mami may collect a share of sales or other compensations from the links on this page.
–
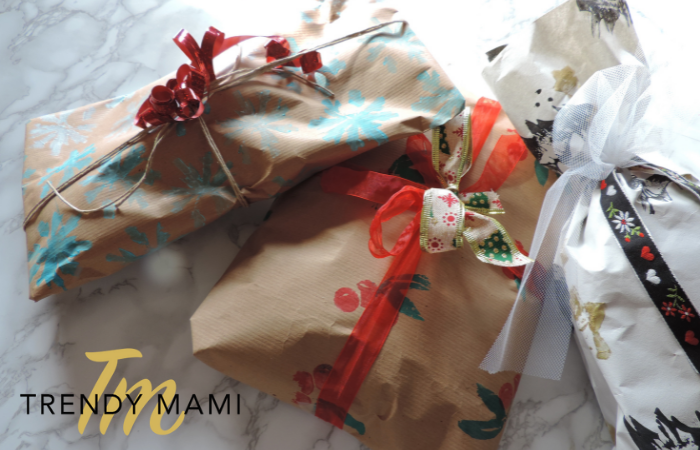
As one of our favorite tutorials for the holiday season, this DIY potato wrapping paper is a cute and festive way for anybody wanting to know how to wrap a gift. Not only are potato stamps fun to make, but it’s also an eco-friendly way to save money during the holidays. So, instead of buying expensive gift wrap, make this custom and personal wrapping paper using a few extra potatoes you have laying around the house.
Making Your Own Gift Wrap
This tutorial is also great for kids. While we recommend that adults use the knife and cookie cutters, you can let your little ones go to town stamping and making their own colorful designs with their potatoes.
Materials:
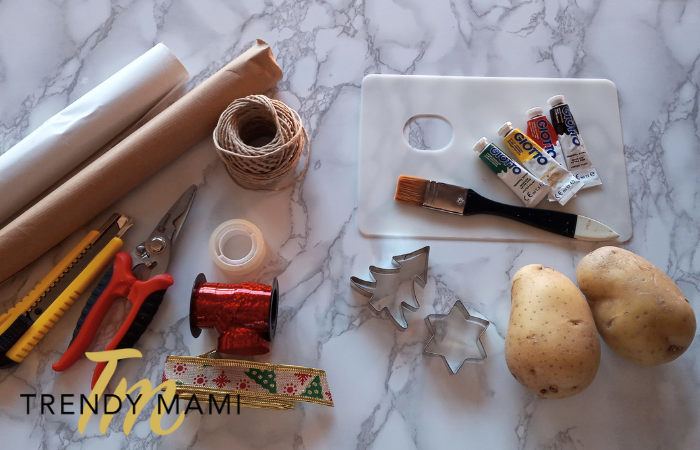
- White/Brown craft paper
- Twine
- Craft paint colors
- Palette
- Brush
- Cutter or craft knife
- Scissors
- Tape
- Ribbons
- Cookie-cutter
- Potatoes
You can find all of these products at Target, plus many more! Don’t forget to also check their store for gifts that you can wrap in these DIY wrapping paper designs.
Instructions using a cookie-cutter:
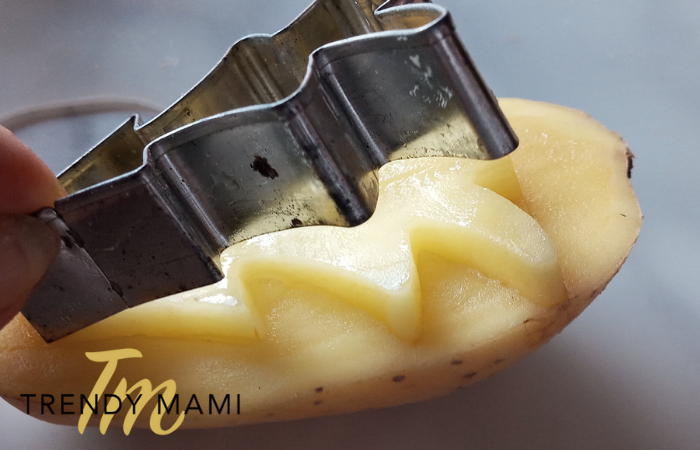
- Take one potato and cut it in half horizontally.
- Choose your cookie cutter shape and place it on the sliced side of the potato.
- Press down until the cookie cutter is inside the potato. Don’t remove it quite yet.
- With your knife, cut around the shape of the cookie cutter. You’ll want to trim about .5 inches off the edge of the potato until the figure is carved out.
- Remove the cookie cutter. If you’d like, you can make extra cuts into the potato shape for a more intricate design.
*If your potato is fresh, it might be wet and juicy when you carve into it. You can dab it with a paper towel or cloth to help absorb some of the moisture to make carving and stamping easier.
Instructions using a craft knife:
- Take one potato and cut it in half horizontally.
- On the inside of the potato, draw a design with your marker. Again, if the potato is too wet, you can dry it with a paper towel or cloth to help make drawing on it easier.
- Using your knife, carve out the design that you just drew.
Instructions on how to make gift wrap:
- After you carve and dry your potato stamps, you can now use them to make wrapping paper. We will show you how to do this with your potato and how to wrap a gift!
- Start by measuring and cutting your craft paper to fit the gifts you want to wrap. If you’re wrapping clothes or other oddly-shaped items, we’ll show you how to wrap those a bit later in this tutorial. Once the paper is cut, lay it flat on the table.
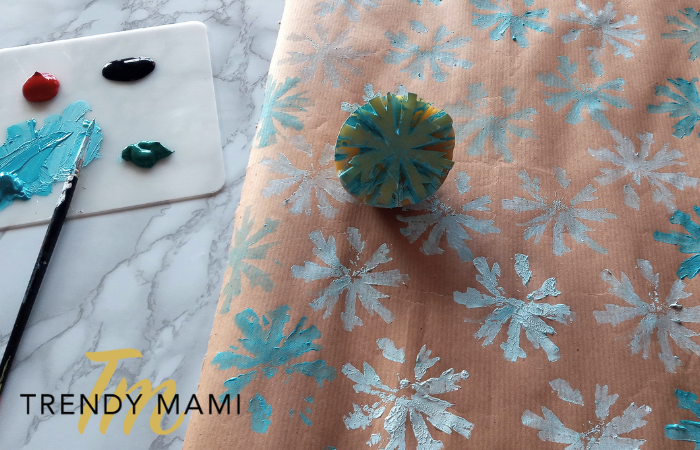
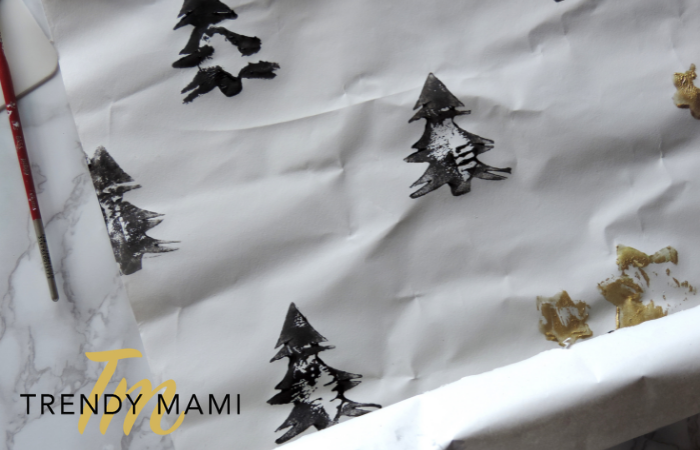
- Pour some craft paint (choose your favorite color!) onto your paint palette.
- Dab your brush (we like this variety pack of brushes from Wal-Mart) in the paint and color the carved-out stamp you cut on the potato. Make sure to cover the entire shape with paint.
- Now, stamp the potato onto the craft paper. You can be creative with the design and pattern. After each stamp, you might need to brush more paint onto the potato to have a consistent color and shape.
- After your design is done, wait until the paint has completely dried before touching or wrapping.
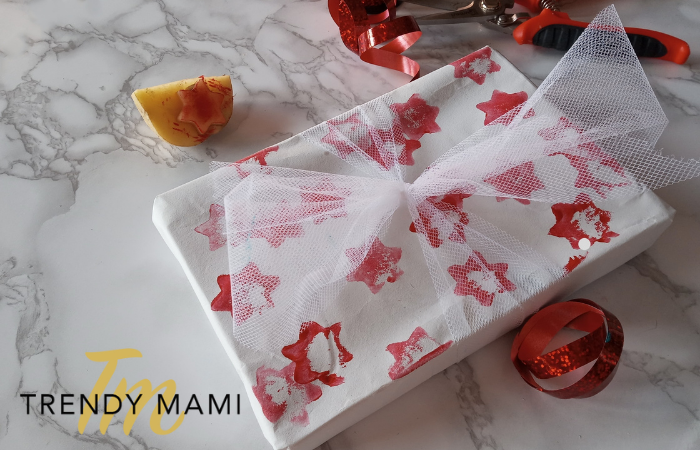
- Wrap your gift with the potato paper! To make it more festive, feel free to add bows, ribbon, or any other finishing touches you’d like.
If you’re wondering how to wrap a gift for an oddly shaped item, we have a hack that can make this annoying task much easier! All you have to do is add flat pieces of cardboard to one or both sides of your gift. This gives the item structure and makes it easier to wrap with your gift wrap paper.
You can also add your potato prints to gifts that are already wrapped. We recommend stamping on solid color or craft paper gift wrap. The potato stamp might not stand out against a strong pattern or design.
More Christmas DIY
Making your own stamps and gift wrap is a fun way to add a personal touch to your holiday gifts. You’ll amaze everyone once they realize you used a potato! If you’re looking for other Christmas-themed projects, then check out our Christmas Tree gluten-free zucchini cakes or our adorable DIY felt ornaments.