We hope you love the products we recommend! Just so you know, Trendy Mami may collect a share of sales or other compensations from the links on this page.
–
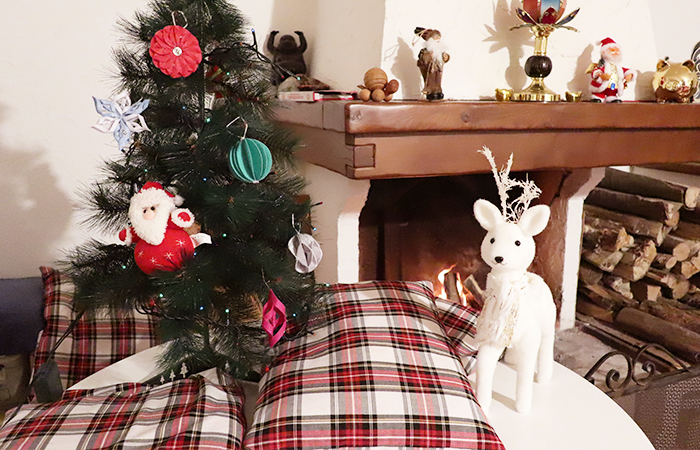
There are so many different things to love about the holiday season. This includes making some cute decorations for the tree!
Christmas is near (can you believe it?!), and you’ve still got some time to create a few memories—in the form of felt ornaments—to add to your Christmas tree this year.
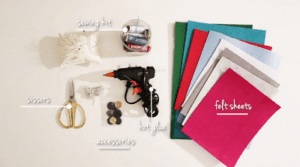
All you need to do is take a quick trip to a local arts and crafts store or shop online at Joann’s. Then, warm up some hot cocoa, put on a favorite Christmas movie, and read our instructions! Let’s start off with everything you will need:
Oh and don’t forget to scroll down and check out our video tutorial at the end of the article!

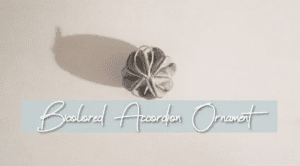
Bi-Colored Accordion Ornament
What You Will Need:
- 2 different colors of felt sheets
- A sewing kit
- Scissors
- Straight pins
- String or ribbon
Check out Joann’s and get all your materials for this cute holiday DIY!
Step One: First, I cut out six circles from two different colors of felt (which should be 12 total). Then, I layer the disks in alternating colors. For instance, if I want my ornament to be silver and gold, I would place the silver on top of the gold.
Step Two: I take a piece of string, tie a knot in it, and place it in the center of six layers of felt. Then, I sew the circles and the string together. Afterward, I add the other six layers of felt and sew them in place in the same way.
Step Three: Next, in order to create the accordion effect, I sew straight down the middle of all of the circles. I make sure that the space between my threading is as even as possible.
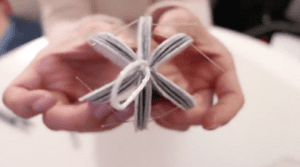
Step Four: I divide up the sides of the now big ball of felt into twos and secure each with a straight pin.
Step Five: This next step is easier to understand if you look at the video (1:08). I sew each side of each section at the top (Point A), the middle (Point B), and the bottom (Point C). I do this all the way around the ball in order to create a cool accordion effect. And I’m done!
Helpful Tip: Make sure you choose a color of thread that won’t show up after you’re done.
Spiral Ornament

What You Will Need:
- 1 sheet of felt
- A pen (or marker) and ruler
- Scissors
- A hot glue gun
- Thread
- String or ribbon
- Other garnish (like a small bell)
Check out Joann’s and get all your materials for this cute holiday DIY!
Step One: The first thing I do here is cut out a felt square that is no more than 7 cm (or around 3”) wide. Then, I draw three more squares inside of it. I use a ruler if it’s hard to make the squares even.
Step Two: I fold the square diagonally so that it now looks like a triangle. Then, I cut along the lines (that came from making the smaller squares) toward the crease of the triangle.
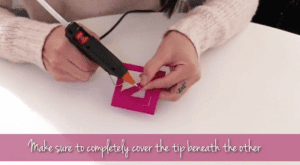
Step Three: This is another part where the video helps (2:54). With the original square open, I am able to see smaller squares. With my glue gun, starting with the smaller square and going to the largest one, I glue the ends of each square to one another. It’s best to do this one layer at a time until I get a literal spiral effect.
Step Four: I complete this ornament by attaching some ribbon and a small ball so that there’s a ball showing at the bottom of the ornament. I also make sure that I have a ribbon at the top so that I can tie and knot in it. And I’m done!
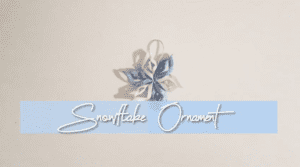
Snowflake Ornament
What You Will Need:
- 3 different colors of felt sheets
- A pen (or marker) and ruler
- Scissors
- A hot glue gun
- String or ribbon
Check out Joann’s and get all your materials for this cute holiday DIY!
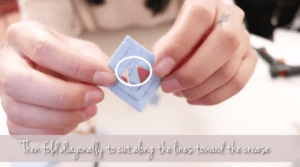
Step One: For this one, the first thing I do is choose three colors of felt. Cut six squares out of each color and then draw three more squares within each square (just like with the spiral ornament).
Step Two: I fold the square diagonally so that it now looks like a triangle. I cut along the lines (that came from making the smaller squares) towards the crease of the triangle.
Step Three: Starting with the smallest square in each square, I take two sides of it and use my glue gun to secure them together.
Step Four: I then flip each square over and fold each of their sides, layer by layer. Then, I glue them together, just like I did the smaller square (only in the opposite direction). I do this with all of my squares until I basically end up with a whole lot of smaller spirals.
Step Five: I assemble all of my little spirals together, making sure that the three colors alternate. I run some thread through the bottom of each tip until they all connect and create a snowflake.
Step Six: Then I sew the sides together, just to make sure my snowflake is nice and secure.
Step Seven: Just one more step. I attach some string (or ribbon) to the top of the snowflake and now it’s ready to go too!
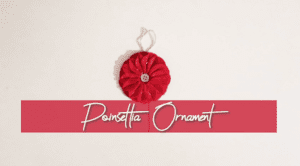
Poinsettia Ornament
What you will need:
- Red felt
- Green felt
- A pen (or marker)
- Scissors
- A hot glue gun
- A button (preferably a crystal one)
- String or ribbon
Check out Joann’s and get all your materials for this cute holiday DIY!
Step One: I cut out 14 small red circles (I’d say silver dollar-sized) of felt. Then, I bend each one into a cone shape and secure the middle together with my glue gun (think flower petals!). Once I’m done, I’ll have 14 red felt cones.
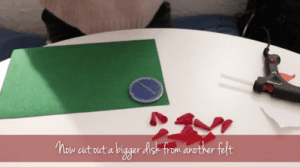
Step Two: Now, it’s time to make bigger circles out of my green felt. In order to do this, I typically use the bottom of a coffee mug. Once I’m done, I move these circles over to the side. Create as many circles as you need to make as many ornaments as you want!
Step Three: Similar to how I did the snowflakes, I take two cones and glue the sides together. Then, I take another cone and glue a side of it to a side of the two cones. I do this until I ultimately end up with a corolla.
Step Four: Once I’m done with that, I take one of my green circles and glue it to the back of my corolla.
Step Five: I complete this ornament by gluing a crystal button into the middle of my cute poinsettia. I also attach a piece of string (or ribbon) to it so that this one can hang from my tree too.
Oh, and if you have a real-life poinsettia at home, check out our tips on how to keep it alive after the holidays!
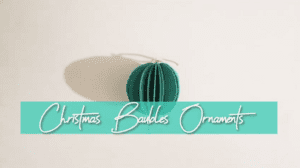
Christmas Bauble Ornaments
What You Will Need:
- 1 felt sheet
- Scissors
- String
Check out Joann’s and get all your materials for this cute holiday DIY!
Step One: I cut out 12 circles of felt. Then, pile them on top of each other.
Step Two: I take a piece of string (or ribbon) and tie a knot at the end of it.
Step Three: I put the string at the top of the circles, halfway through them. Meaning, I count six circles and put the string on the sixth one, and then attach the other six.
Step Four: Next, I sew all the way down the middle of what’s now a “ball” of felt (that’s what will hold all of the pieces together).
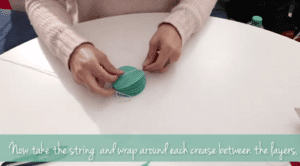
Step Five: I take some string and first wrap it around the middle of the ball (where I just sewed it together). Then, I use the same string to go through each layer/crease of the ball. That’s what will eventually create a bauble effect. Make sure to cut the excess string so that all that shows is the top of the string/ribbon.
Time to Decorate!
And just like that, I’ve got ornaments that are ready to hang—and so will you! Have presents you need to wrap? We can help! Check out our fancy gift-wrapping videos!
If you love our videos, we have more! Head over to our channel and check them out!
Merry Christmas memory-making with your ornaments!