We hope you love the products we recommend! Just so you know, Trendy Mami may collect a share of sales or other compensations from the links on this page.
–
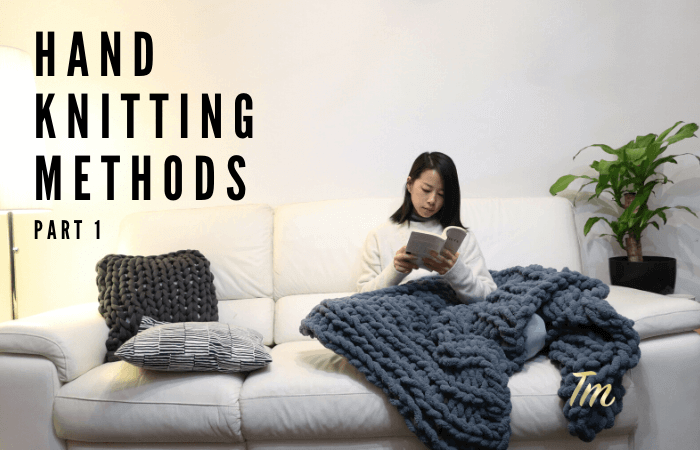
Where are our sewers and quilters at? Welcome! If you’re new to sewing and quilting, don’t be intimidated! These helpful blanket and pillow case stitching methods are easy and beginner-friendly, and with some practice, you’ll be a pro! For an extra helping hand, be sure to watch our video tutorial. Pssst, this article is part one to our DIY chunky blanket tutorial, teaching you the stitching methods you need to make your very own DIY chunky knit blanket.
Be sure to keep your eyes peeled for part two! It’s also good to note that the material needed for this DIY is cheaper than going out and buying your typical chunky knit blanket, which averages at $200. So if you’re looking to save money and wanting to take your DIY craftiness to the next level, let’s get started!
How To Arm Knit – Tutorial:
Materials:
- [easyazon_link identifier=”B07GSLJN12″ locale=”US” tag=”twkmobile-20″]Chunky Yarn for Blanket[/easyazon_link]
- [easyazon_link identifier=”B07MGNN3X5″ locale=”US” tag=”twkmobile-20″]Chunky Yarn for Pillow Case[/easyazon_link]
Check out Annie’s for other DIY materials or even chunky blanket materials, they have so many colors to choose from!!
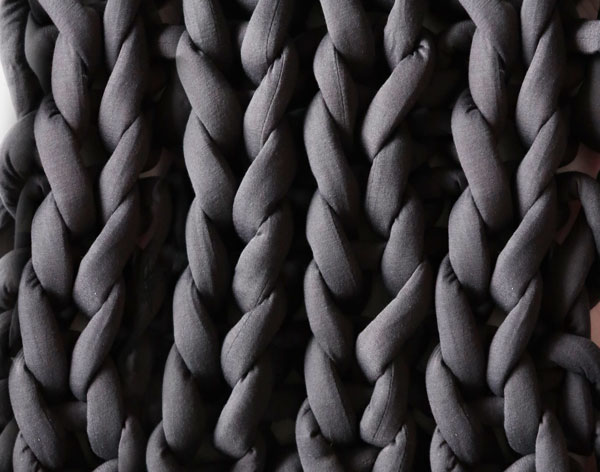
1. Stockinette Stitch Style
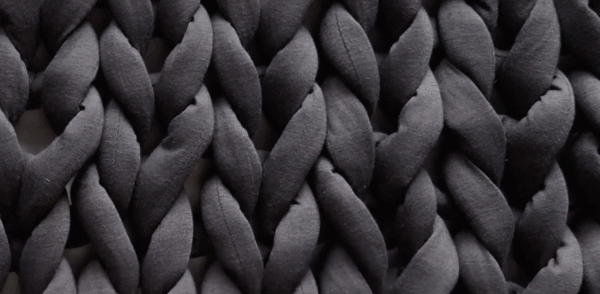
Starting Stitching Method: Long Tail Cast
For our starting method, long tail cast, take your yarn and twist the tail yarn, reaching through the loop we just created and pulling the yarn, tying it. Repeat these steps for as many stitches as you need.
With the row of stitches you have from the long tail cast starting method, grab the live yarn and pull it through the first stitch (loop) and lay it flat. Repeat this step with your other stitches (loops) until your whole row is complete. Voila, there you have a stockinette stitch!
Closing Stitching Method: Loop on Loop
To tie off your stitches (loops), take the last loop on the end and reach your hand through, grabbing the next loop and slipping the last loop over it. Repeat this step until you have no more loops left and tie off with the remaining yarn.
2. Ribbing Stitch Style
Starting Stitching Method: Chain of Stitches
For our starting method, chain of stitches, take your yarn and twist the tail yarn, reaching through the loop we just created and pulling the yarn, tying it. Then, grab the live yarn and pull it through the first loop. Repeat this step for as many stitches as you need.
Take your stitches from the chain of stitches starting method and grab your live yarn and pull it through the first stitch and lay it flat. Repeat this step until you have completed the first row.
Now pull the yarn through the stitch from back to front, then from front to back, creating a reverse stitch. Complete the row and repeat this step for the next. Voila, there you have a ribbing stitch!
Closing Stitching Method: Loops and Yarn
Taking the last two loops, pass your hand through and grab the live yarn and pull it through the loops. Repeat this step to close off the row. Once complete, tie off with the remaining yarn.
We hope you enjoyed this chunky blanket knitting methods article, part one to our DIY chunky knit blanket tutorial! Be sure to practice these stitching methods and keep your eyes peeled for our part two, DIY chunky knit blanket tutorial!
BONUS TUTORIAL: DIY Pillow Case
What you will need:
- [easyazon_link identifier=”B07MGNN3X5″ locale=”US” tag=”twkmobile-20″]Chunky Yarn for Pillow Case[/easyazon_link]
Check out Annie’s for other DIY materials or even chunky blanket materials, they have so many colors to choose from!!
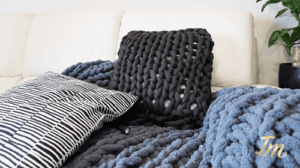
Take two knitted squares of yarn, using either the stockinette stitch style or ribbing stitch style, and layer one on top of the other. To form our pillow case, use the closing method, loop on loop, mentioned above. Take one loop (from the top square of yarn) and put it through the loop of the other square of yarn (on the bottom). Repeat the process until you have no loops left. Tie off the last loop with the loose yarn.
Moving on to the sides, take the live yarn and wind it through the loops (of both squares of yarn) until complete. Repeat this on the other side. Now place your cushion pillow in, through the bottom, that we left open. Once complete, close the bottom with the same method used above. Now you have a matching DIY giant chunky knit blanket and cushion!
For now, feel free to check out some of our other holiday DIYs like the Teddy Bear Warming Bag, DIY Felt Food for Kids (a great holiday gift idea), DIY Felt Ornaments for Your Tree!