We hope you love the products we recommend! Just so you know, Trendy Mami may collect a share of sales or other compensations from the links on this page.
–
2How about making some DIY felt food for kids?
What is felt food? Pretty much just what it sounds like. It’s adorable food items that are handmade out of felt. It’s a great way for them to pretend that they’re enjoying some of their favorite fast food! Without all the unhealthy stuff, of course.
Are you ready to put a last-minute present together?
Scroll down to check out our felt food preparation video and assembly video!
Looking for crafting materials, check out Joann for all your crafting needs!
DIY Felt Food for Kids
What You’ll Need:
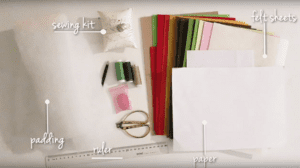
- Felt sheets
- White paper
- Padding
- Sewing kit
- Ruler
- Scissors
- Glue
Check out Joann’s for other DIY materials or even felt DIY materials. They have so many colors to choose from!
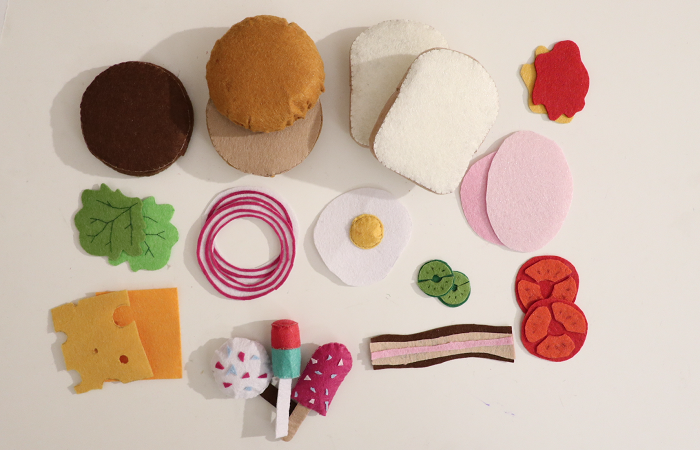
Different Foods You Can Make:
- Lettuce
- Ketchup
- Mustard
- Mayo
- Turkey Breast
- Ham
- Cheddar Cheese
- Emmental Cheese
- Onion
- Egg
- Bacon
- Toast Bread
- Hamburger
- Pickle
- Tomato
OK, let’s begin with the prep tutorial first. Just so that you don’t get (super) overwhelmed, I’m going to walk you through how to prep each food. Then, in the following video, we’ll put together each food that you prepped (make sense?).
PREPPING VIDEO:
In General:
1. First, I decide what kind of “meal” I want to make and select the felt sheets that match the color of those particular foods. Just so that you can follow along with the video, let’s say that I’m in the mood for a hamburger.
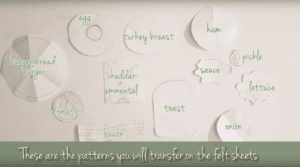
2. I create patterns out of the foods that I selected. It’s not that hard. I just take out a piece of paper and a pencil and sketch out a drawing for each food.
For the Onion Rings:
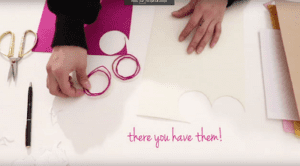
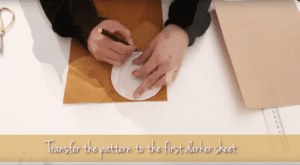
1. With another sheet of white paper, I use my pencil to trace the pattern onto it. So, for instance, in order to create my onion rings, I trace a circle on the white sheet of paper and then trace the same-sized circle on a sheet of purple felt paper too.
2. I then create a smaller circle within the first circle that I made, and I repeat the same steps that I did in Step Three. This means that once you’re done making circles on your purple felt, you should see circles inside of circles.
I keep doing this until I end up with as many onion rings as I want. Usually, I go with 4-5 rings at a time. It’s kind of complicated to understand unless you watch the video. But if you cut along each of the circles, you’ll end up with thin purple rings!
For the Toast:
1. I use the toast pattern and trace it onto a white piece of paper four times (you’ll see why in just a sec).
2. Then, I use a tape measure to see how “long” my slice of bread is. Sometimes, my brown sheets of felt paper aren’t long enough, so I divide each edge into four horizontal strips.
3. My next step is to transfer my toast pattern and put it on top of my white padding. I cut out two toast shapes with the padding.
For the Egg:
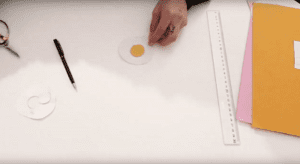
1. I make my egg white by tracing the egg pattern onto a white sheet of felt paper.
2. Then, I trace the yolk pattern on a yellow sheet of felt paper. I like to use a little padding in between the egg white and the egg yolk—again, you’ll see why if you keep watching the videos.
I basically do similar things in order to make the cheeses and slices of bacon (as you’ll be able to see at around 2:54 and 3:05 of the video).
For the Buns:
1. I use one large circle to make my “bun pattern.” First, trace the pattern onto a dark brown piece of felt paper. I do this twice.
2. Next, I make some slightly smaller circles and trace them onto the lighter shade of brown paper, twice (which means I now have two smaller circles on the light brown piece of felt paper).
3. Like I did with the toast, I use a tape measure to see how “long” my buns are. Sometimes my brown sheets of felt paper aren’t long enough so I create one long horizontal stripe.
4. So that the buns have some “cushion” to them, I also use my pattern to make two smaller circles with the padding that I have.
For the Tomatoes and Pickles:
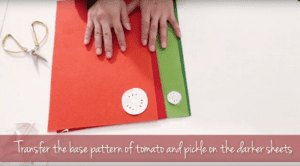
1. These vegetable patterns are a bit more intricate, so if you’re not an art savant, you may want to find patterns to copy off of (like maybe here and here).
2. Trace each vegetable, using the color that you want them to be.
3. In order for both veggies to have a bit of a 3D effect, I like to make the “skin” of the vegetables out of a dark hue and the insides out of a lighter shade. For instance, I will use dark red for the outside of the tomato and pink for the inside of the tomato.
Whew. OK, now it’s time to view the assembly video to put everything together!
ASSEMBLY VIDEO:
For the Tomatoes and Pickles:
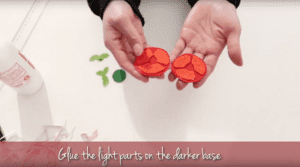
Now, it’s time to pull out some glue and attach the inner parts of my tomatoes and pickles to the outer parts. I also do this for my bacon (0:30 on the video).
For the Onion Rings:
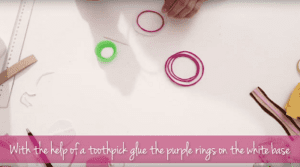
Remember how I have white circles and purple “rings?” It’s now time for me to glue those pieces together (0:44 of the video). So that I don’t make a mess, it’s easier to apply the glue by putting some on a toothpick, rubbing it onto the back of the purple rings, and then letting the glue dry.
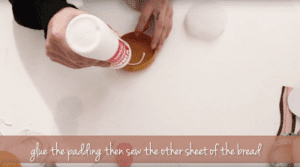
For the Toast:
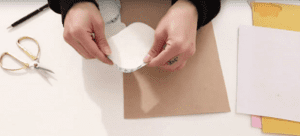
1. This is what I’ll need my sewing kit for. Remember the horizontal strips that I made? I use one of those to sew a blind stitch onto the white sheet of toast (this part is at 1:10 of the video). I do this all the way around the white sheet until it creates the “crust.” Whatever excess paper is left over, I simply cut that off and close the seam.
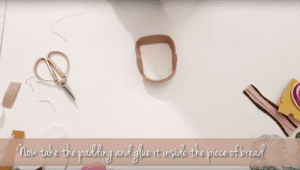
2. Next, I take the padding that is toast-shaped, apply some glue around its edges and place it inside the toast.
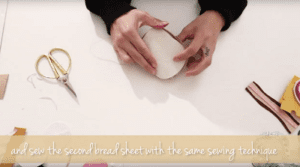
S3. I put the other white sheet on top of the padding and use the same blind stitch technique to “cover-up” the padding.
For the Egg:
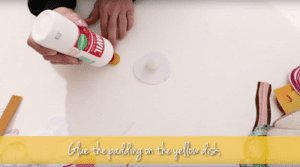
1. This part of the video is at 2:22. With the small padding circle that I created when I cut out the egg pieces, I glue the padding to the yellow circle and add them both to the white egg part (the egg white).
2. In order to secure the “egg white” to the egg yolk, I sew them together using the back stitch technique.
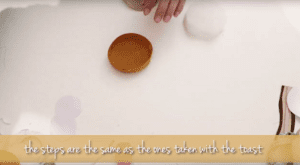
For the Buns:
- This portion of the video begins at 2:59. Basically, I do the same thing to make the buns that I did to make the toast. I take the horizontal strip of felt and use the blind stitch method to sew all the way around the large dark brown large circle. Then, I cut the excess and again, close the seam.
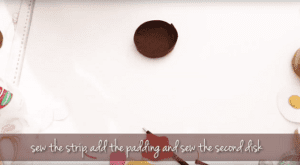
2. The padding that I have for the buns I glue around the padding, put it into the bun, and put the lighter brown circle on top. I sew it to the bun.
3. For the top bun, I glue padding to the other large circle. Then, I apply some glue to the sides of the padding and attach the sides of the bun to the sides (it’ll basically look “bunched up” when you do it and that’s a good thing).
4. I put one of the light brown circles on top of my now “bunched up bun” and sew the top and bottom of the bun together with the blind stitch technique again. If everything seems to move all over the place, hold the sides you’re not currently sewing together with some straight pins.
For the Meat:
1. Where on the video is this? This time, it’s at 4:46. The same steps that I used to make the bottom part of my burger bun? I basically “rinse and repeat” that here.
For the Lettuce:
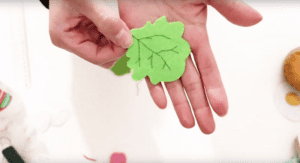
1. At 5:02 on the video, you’ll see that the first thing that needs to be done is using some dark green thread to create “veins” into the lettuce. To get the best results, I prefer going with the Back-Stitch technique.
Make Them Merry!
Need other gift ideas? Don’t fret we have more! Go check them out!
Oh and I almost forgot all about what I’m going to wrap these gifts in! Good thing we have a gift wrapping video for that!!
Merry DIY Christmas, everyone! I hope your little ones enjoy these DIY felt foods for kids!