We hope you love the products we recommend! Just so you know, Trendy Mami may collect a share of sales or other compensations from the links on this page.
–
Although the inside of your home may be ready for the fall season, it’s also important to bring the festivities outside with these Autumn-themed Thanksgiving porch décor DIYs! First, we’ll be making an adorable Thanksgiving wreath that you can hang on your front door to welcome your guests for dinner. Then, for our second tutorial, we’ll show you how to craft your own fall candle votives that look great inside or outside.
Lovepop has recently launched its range of holiday cards including this 3D candle card. These are way too cool to send to other people instead of grabbing them for yourself, so why not use a couple as Christmas table centerpieces for something a little different this year? Of course, you may also want to buy a few extra to send to loved ones too.
Thanksgiving Porch Décor to Spruce Things Up
Slip on your coziest wool sweater, pour yourself a cup of tea, and get ready to add a bit of Thanksgiving glam to your front porch!
Festive Thanksgiving Garland
Materials:
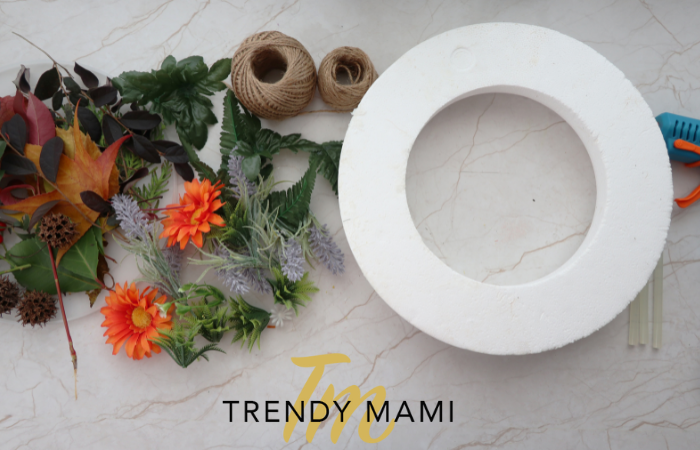
- Styrofoam wreath base
- Twine
- Fake flowers or dried leaves
- Hot glue or Gorilla Glue
- Plastic bag (optional)
Instructions:
- Before you make your Thanksgiving porch décor, you’ll want to prep your workstation by laying out a plastic bag to prevent anything from spilling.
- Using your glue gun or Gorilla Glue, glue the end of the twine to the back of the Styrofoam wreath. To ensure it’s secure, let it dry for a few minutes before continuing to the next step.
- Working in small sections (2 to 3 inches at a time), add a layer of glue across the surface of the wreath.
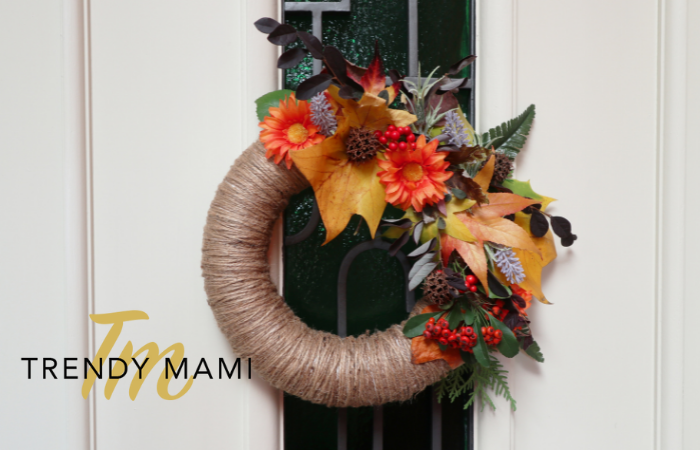
- Wrap the twine around the area of the wreath that has glue. Make sure the twine is tightly wrapped so that you don’t see the white styrofoam underneath it.
- Keeping wrapping around 90 percent of the entire wreath.
- Once that’s finished, cut the twine leaving a 6-inch section at the end.
- Make a loop with the loose twine, gluing the end of the loop to the back of the wreath. This will be the hook that allows us to hang the wreath on the door.
- Now take your dried leaves or flowers and create a pretty arrangement on the remaining white area of the styrofoam. We recommend playing around a bit with the design before actually gluing anything on. Remove the leaves once you find an arrangement you like and get ready to start gluing.
- Take a little more twine and loosely wrap it around the remaining white section. This will allow us to stick the leaves and flowers more easily onto the wreath.
- Glue the leaves and flowers onto the front of the wreath and twine. You can also add more greenery to the back of the wreath for an extra layer of added dimension. For our Thanksgiving porch décor wreath, we covered about half of the wreath with leaves and flowers. But feel free to design your wreath however you see fit!
- Let the glue dry before hanging your Thanksgiving DIY décor.
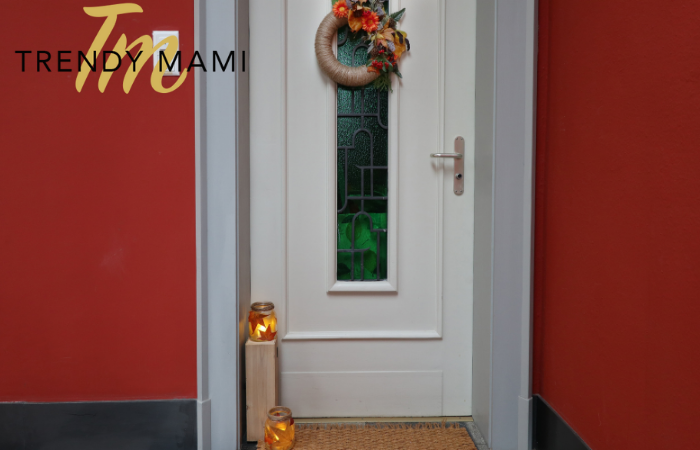
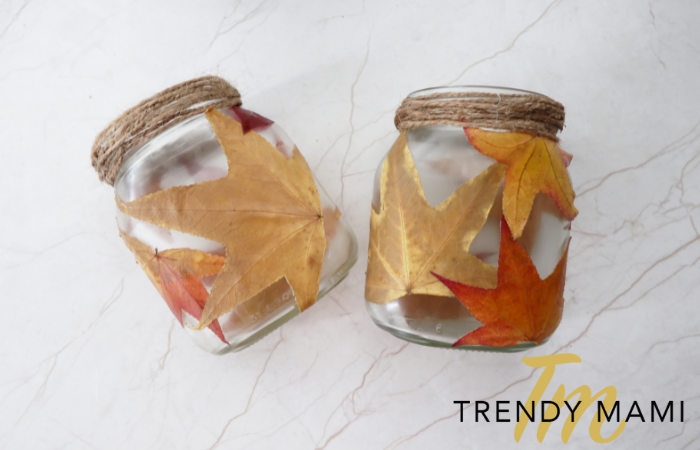
Jar Lantern Thanksgiving Porch Décor
Materials:
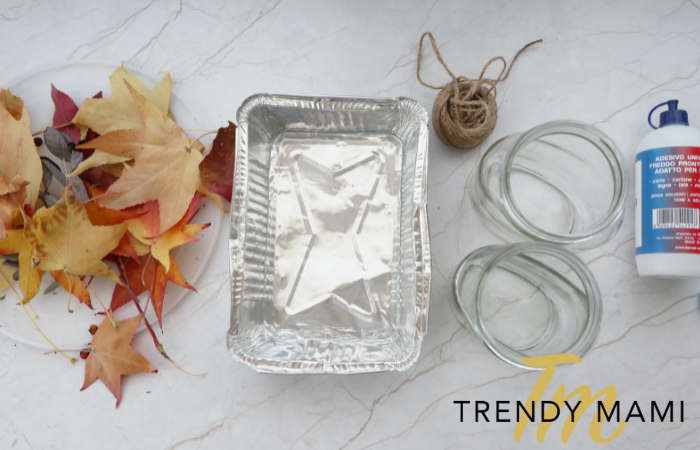
- Glue
- Water
- Foiled container
- Mason jar
- Dried or fake leaves
- Paintbrush
- Light or candles
- Plastic bag (optional)
- Napkin or towel (optional)
Instructions:
- Layout the plastic bag on your workstation to prevent any glue from spilling or sticking.
- We will start by making a glue and water mixture that’s thin and easy to paint onto the jars for this Thanksgiving DIY décor. Add a thin layer of water and a few squirts of glue to the foiled container.
- Using your paintbrush, mix the water and glue together until combined.
- Take one of your leaves and completely soak it in the glue mixture. Make sure to cover both sides.
- Place the leave on the mason jar in any way you’d like. Use your hands to stick the different ends of the leaf around the curves of the jar so that it’s flush against the side and that there are no air pockets.
- If there is excess glue on the jar, take a wet towel or napkin to wipe it away.
- Continue this process of dipping leaves until you have designed your perfect jar.
- Now with your paintbrush, spread an even coat of the glue mixture over your set leaves to make sure they stick to the jar.
- Trim any excess stems or parts you don’t need.
- If you want the jar to have a frosted effect, you can paint glue over the glass between the leaves.
- Let the jar dry for at least an hour.
- Place a light or candle in your jar and enjoy the warm, cozy atmosphere of Thanksgiving!
More Thanksgiving Ideas
If you need some extra inspiration for decorating the inside of your house, then we’ve also got you covered! Here are a few creative home décor ideas for Thanksgiving to transform your home for Turkey Day. And don’t forget to do some of the fun fall activities while you’re at it as well!