We hope you love the products we recommend! Just so you know, Trendy Mami may collect a share of sales or other compensations from the links on this page.
–
Is one of your favorite things about the holiday season, being able to formally set your dinner table? If so, you probably already have a [easyazon_link identifier=”B07937D9P7″ locale=”US” tag=”twkmobile-20″]set of linen napkins[/easyazon_link] that you plan on using. But this year, instead of simply folding them in half and putting them on the side of each plate, how about creating a fun shape for them?
Initially, it might sound difficult (or at least frustrating) to do. But if you follow these steps—carefully and in order—once you get the first two down, you’ll be able to breeze through the rest. And, totally impress your guests (especially the kids) this holiday season!
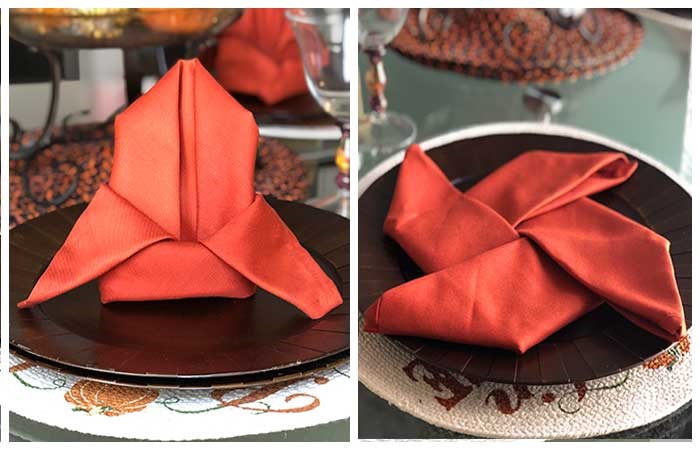
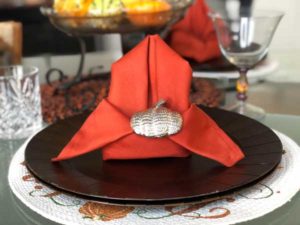
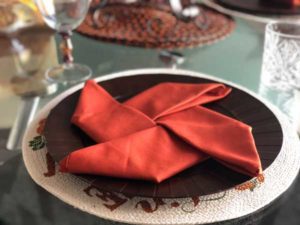
The BISHOP’S HAT
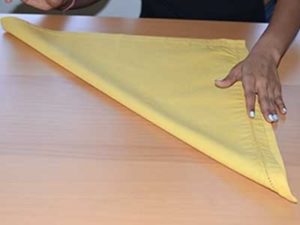
Step 1:
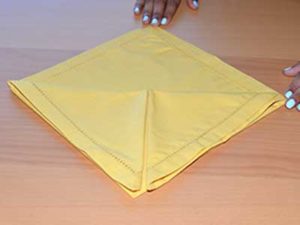
First, I start off with laying a linen napkin flat on a table. Then I fold it diagonally in half until it looks like a triangle.
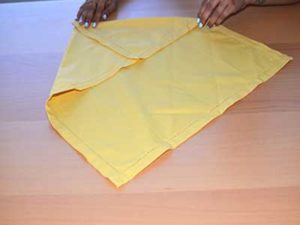
Step 2:
I turn the napkin around until the base of the triangle is closest to me. Then I take the right corner and fold it over until it’s pointing directly into the middle of the napkin.
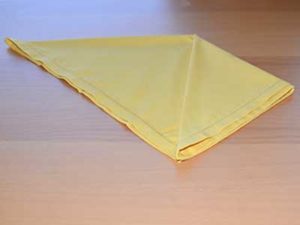
Step 3:
I do the same thing with the other side until the entire napkin basically looks like a square with two smaller triangles inside of it.
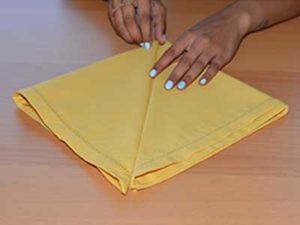
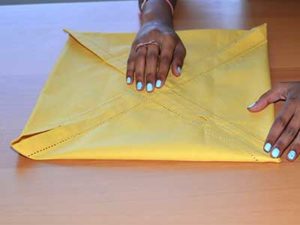
Step 4:
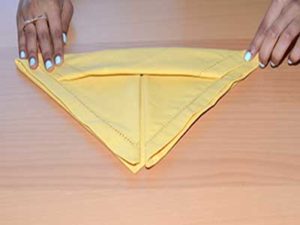
I take the left and right corners of each triangle and pull them each down towards me in order to create two smaller triangles.
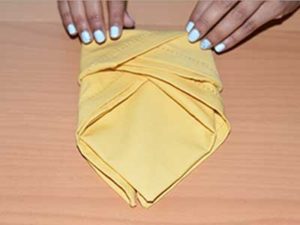
Step 5:
With one side of the napkin, I pull down the corners on both the right and left side until it looks like I made two even smaller triangles.
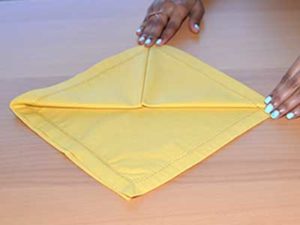
Step 6:
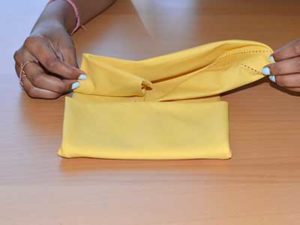
Then I turn the “open” part of the napkin around so that it is closest to me.
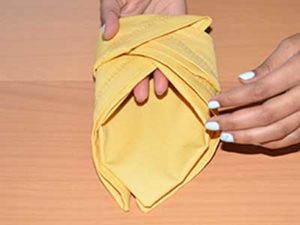
Step 7:
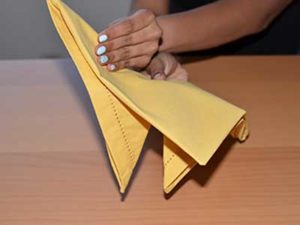
With the open part of the napkin, I create three horizontal folds. I make sure each fold is wide enough that the final fold covers up the bottom portion of the two triangles that I made up top (if this part sounds confusing, when you’re done, it should pretty much look like a sailboat).
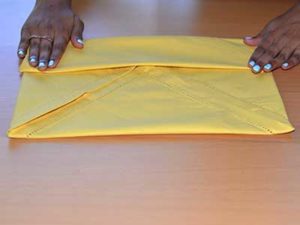
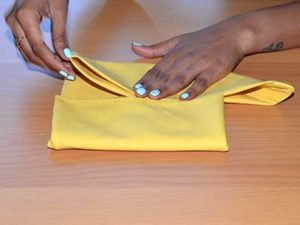
Step 8:
I turn the entire napkin onto its other side and fold the left side about halfway until its close to the center of the napkin.
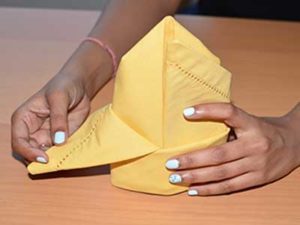
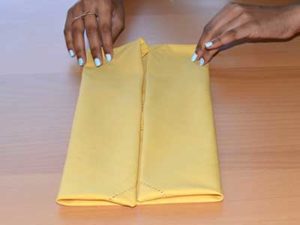
Step 9:
I then take the right side of the napkin and fold it over in order to meet the left side; only with this side, I tuck it into the left side’s flap/pocket.
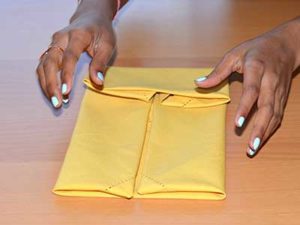
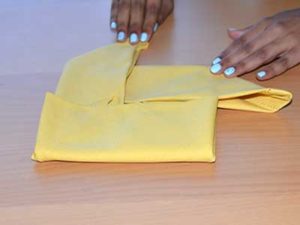
Step 10:
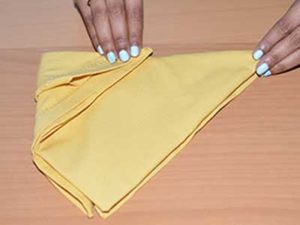
Next, I put my pointer and index fingers together and move them into the inside of the napkin so that I can “open up” the napkin enough for it to be able to stand up on a plate.
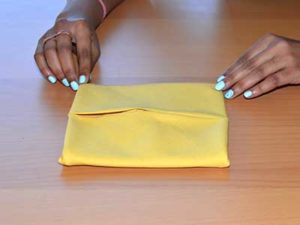
Step 11:
The two parts of the napkin that look like wings? I take right side and fold it down.
Step 12:
Then I take the left side and fold it down too.
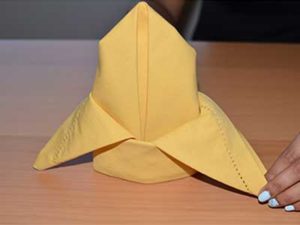
And just like that—I’m done! (At least with the first napkin!)
The PINWHEEL
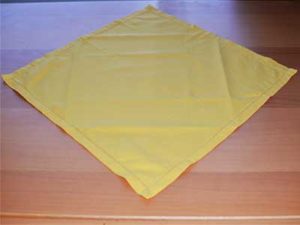
Step 1:
I lay a napkin out flat in front of me so that it’s in a diamond shape.
Step 2:
I pretty much treat the napkin like I’m about to make a paper airplane by folding two small triangles at the top of it.

Step 3:
I take another one of the remaining sides of the napkin and fold it over into the center of it.
Step 4:
I treat the remaining side of the napkin the same way; the goal is to have all of the points of the napkin meeting at the center (it should basically look like a small square with four rectangular shapes inside of it).
Step 5:
Next, I take one half of the entire napkin and fold it upwards until it’s directly in the center (it’ll kind of look like an envelope at this point).
Step 6:
Then I fold the other part of the napkin in half until both sides are evenly meeting in the center (kind of like two sides of a door).
Step 7:
I create a 90-degree turn so that the napkin is laying vertically (instead of horizontally) in front of me; then, I fold the bottom of the napkin halfway up.
Step 8:
I do the same thing with the other half of the napkin until the entire napkin looks like an even smaller square.
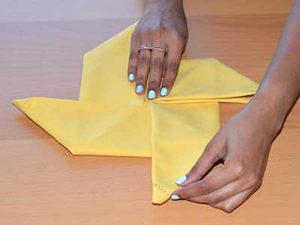
Step 9:
Next up. I lift up the right half of the square so that I am able to see the points that I made inside of it. Then I gently tug on the right side until it comes out all the way horizontally (it will look like a triangle is extending out from the overall square).
Step 10:
Then I do the exact same thing on the left side; only, with this one, I pull it so that it is going in the vertical position (this means that the right half of the napkin will be pointing to the right side and the left half of the napkin will be pointing down in order to create one half of the pinwheel).
Step 11:
The part of the napkin that is right underneath the vertical point, I pull that edge out so that it is facing horizontally to the left.
Step 12:
The remaining part of the napkin that remains? I pull that out until it faces vertically to the right.
If all goes well, what I just created is a pinwheel! Now all I have to do is lay it on my plate and I’m good to go! And you know what? With a little bit of practice, you will be too.
Need something to put on the plate other then a napkin? Some food perhaps? Here is our favorite holiday turkey recipe! And don’t forget some side dishes to go with the turkey, like perhaps garlic mashed potatoes!
Happy Holidays!