We hope you love the products we recommend! Just so you know, Trendy Mami may collect a share of sales or other compensations from the links on this page.
–
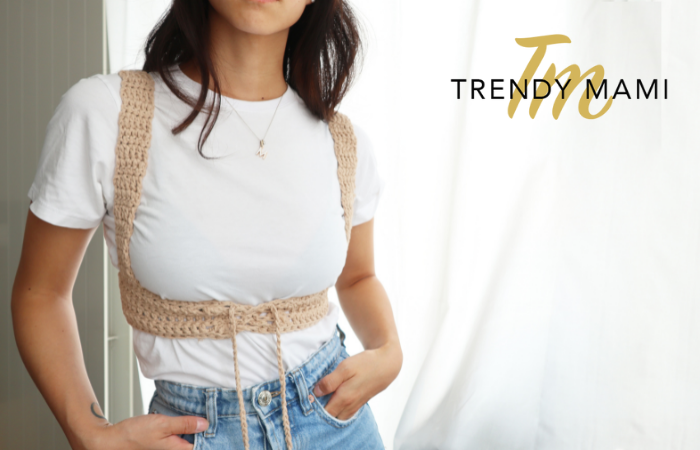
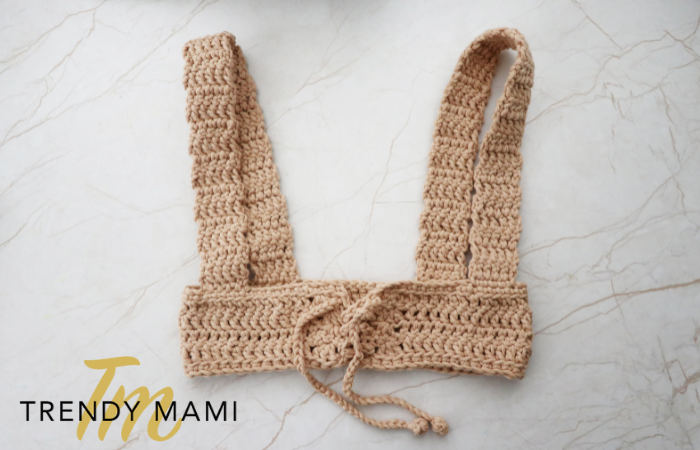
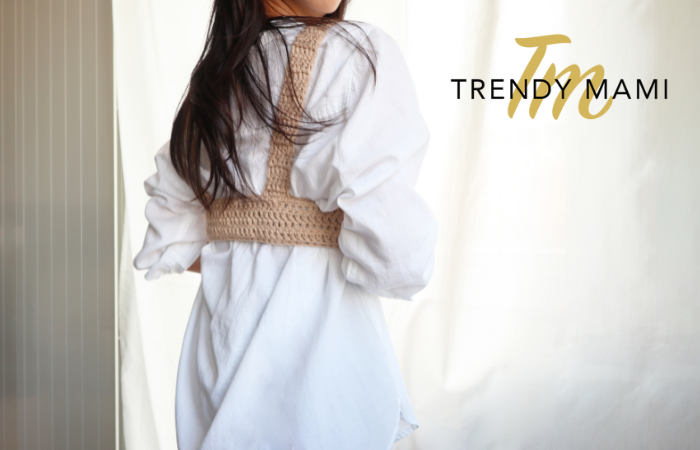
Although this underbust belt corset looks complicated, it’s actually a beginner-friendly design for anyone looking to try making their own DIY crochet top! It’s super soft, stretchy, supportive, and most importantly, trendy and fashionable! You can wear this corchet belt with an oversized T-shirt or a button-up for a timeless and classy look that you can wear to work, dinner, or even just out shopping.
We recommend picking out your favorite colored cotton yarn (we went with this beautiful neutral that can match with practically every outfit). You can find some crochet and crafty supplies at your local Target store!
You will need:
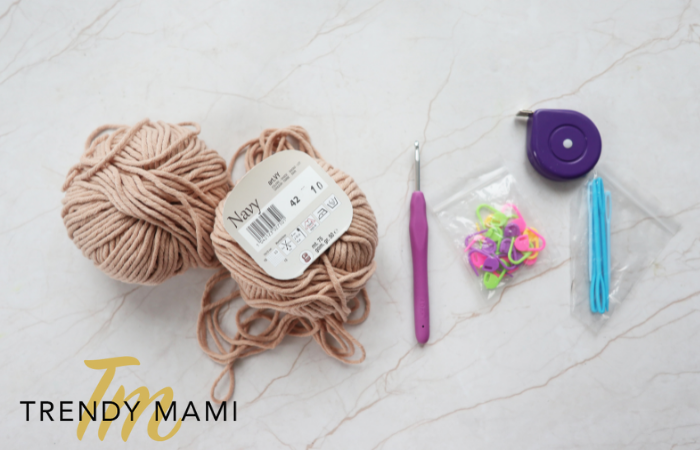
- 8/8 Cotton yarn (100g/3.5 oz)
- 4 mm hook
- Stitch markers
- Measurement tape
- Yarn needle
- Scissors
Instructions to make DIY Crochet Top
Grab your hook and yarn needles and let’s get started with this DIY crochet clothes tutorial.
Making the Crochet Belt
- Let’s start making our DIY crochet clothes! For this belt corset, you’ll start by making a slip knot with the yarn.
- After the slip knot, continue making 73 individual chains. These chains will produce a small size corset belt that is approximately 61cm (24 inches). However, there will be a little elasticity from the yarn that also fits bust sizes that are a few centimeters or inches longer. If your underbust size is larger than 68cm (27.5 inches), we recommend crocheting a few extra chains for more comfort.
- Finish the pattern by adding in one extra chain.
- Now start on the first row and add a single crochet.
- Skip the first two chains and pull the yarn through the third one.
- Continue this process for the rest of the length of the chain.
- Let’s continue to the second row. Here, we’ll use a fan or shell stitch instead to create this beautiful pattern. (you can make a fan stitch by creating two chains and then adding in a turn.
- We will skip the first stitch that is under the 2 chains (this should be the last one in the first row). Skip two more and continue stitching on the following one.
- Use a double crochet technique to create the same stitch 3 more times. You can do this by placing the yarn over the hook and inserting the hook into the stitch.
- Finish by pulling the yarn through and through again.
- Skip one more stitch and add a double crochet on the subsequent stitches until you have 5 remaining stitches from the end.
- Repeat steps 8 to 11 to create your fan stitch. Afterward, you should have a complete second row!
- We will use this same technique to create the 2nd, 3rd, and 4th row of our DIY crochet clothing corset.
- The 5th row is a little different. Instead of the fan stitch, single crochet or back loop the entire row. You can do this by inserting the hook front to back and then again back to front.
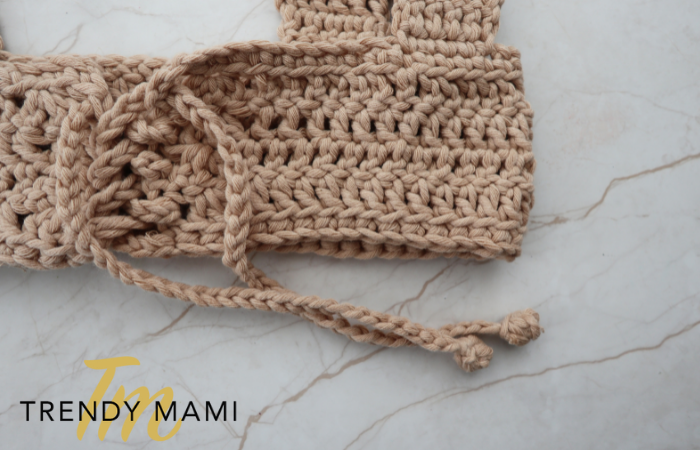
- Once the 5th row is complete, you will have a belt shape that likely has loose ends. We’ll explain how to tie those ends in the next section.
Making the Straps
- Take your stitch markers and add them to stitches 11, 15, 25, 29, and 36 to mark where the straps will go.
- Each strap contains 5 stitches. To start, add a new thread from the back to the first stitch.
- From there, make a single crochet until the last stitch.
- Flip over and add two more chains.
- To finish off the row, use the double crochet technique.
- Flip the strap again and repeat with the double crochet until you have a strap that is 56cm (22 inches) long. This should be around 30 rows.
- Make one last single crochet row to tie the strap to the back.
- Repeat steps 1 to 7 to make the second strap.
- Once the straps are attached to the belt section, you’ll want to tie up the loose ends. To do so, take your yarn needle and tangle the ends inside the stitches.
- That’s it! Now you have a beautiful, handmade DIY crochet top.
More DIY Projects
We love these fun and easy DIY crochet clothing tutorials because they’re a great way to add staple pieces to your wardrobe without spending an arm and a leg.
And if you’re feeling extra creative, why not try making your own knit hat with our DIY Bear Beanie tutorial or a warm and chunky blanket with this knit blanket tutorial? With the days getting longer and colder, you may also want to check out our favorite sweaters and jackets to help spruce up your fall and winter wardrobe.