We hope you love the products we recommend! Just so you know, Trendy Mami may collect a share of sales or other compensations from the links on this page.
–
DIY boho decor using macrame was a popular trend in the 70s. However, it’s made a resurgence in the last few years in the form of wall hangings, plant holders, and accessories. Although you can buy macrame in most home décor stores, it’s so much more fun to make your own boho crafts!
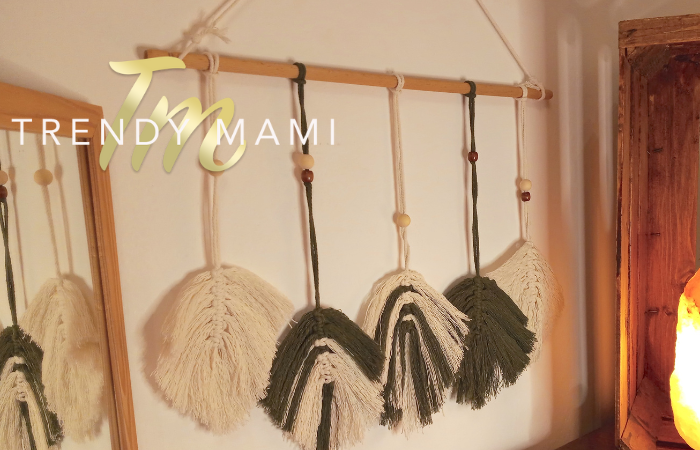
Macrame Hanging DIY Boho Home Decor
In this tutorial, we’ll be making a macrame feather wall hanging. It only requires a few materials and three simple knot styles, making it a perfect project for beginners. We’ve chosen two colors (one neutral and one green), although you can use any colors you like. Feel free to take a look at our video to see pattern and color ideas for the different feather options.
Materials:

- Natural Macramé cord
- Colored Macrame cord
- Wooden Beads from JOANN
- Comb from Target
- Scissors
- Measuring Tape
- Paper Tape
- Wooden Rod
Instructions

- To start our macrame feather wall hanging, you’ll want to apply a piece of tape to the ends of all the cords. This will prevent your DIY boho decor from fraying while also making it easier to knot.
- Now, measure out 35 inches (89cm) of the natural-colored macrame cord. This will be used to make the spine of the feather.
- Then, cut a few more pieces of cord using this cord as a template. The number of cord pieces will depend on how many feathers you want to make.
- The next step is to cut the rope for the feathers. Each feather needs 20 pieces of cord measuring 8 inches in length.
- Our first knot will be the Lark’s Head Knot, which uses our wooden rod. Take the feather spine cord and fold it in half so you have a loop. Place this loop under the rod and insert the ends of the cord through the middle. Now pull until the knot is on the rod.
- Continue attaching all the feather spine cords to the stick.
- Take your wooden beads and slide one or two onto each feather spine cord (both ends of the cord go in the bead hole).
- To secure the bead, we will make a Square Reef Knot. This requires the small 8-inch cords you cut earlier. Take one cord, fold it in half, and place it horizontally under the spine feather cord. Next, take another cord, fold it in half, and put it horizontally over the spine feather cord. Now, pull the bottom strands through the loop. This should create your first knot!
- For the next row, repeat the same but using an alternate starting side (the first loop should be on the left, then on the right, etc.)
- Continue until all 20 pieces are used on the feather.
- You can push the feather strands up towards the rod to tighten and adjust the knots.
- Repeat steps 8 to 10 with the rest of your feathers.
- Once the feathers all have their strands, we can brush them out to make them fuller. Then, starting at the spine, take your comb and push it into the cord. It may take several hard strokes to get the cords to fluff open.
- Now you can trim the cords into the shape of a feather. You might need to brush them out once more to give them a fuller shape. To keep the fringe fluffy, feel free to spray the strands with hairspray.
- For the final step, you’ll need one last piece of cord so you can hang your boho crafts on the wall.
- Make a loop and tie a knot around each end of the wooden rod. Grab the rope from the center and hang your beautiful creation anywhere you want in your home!
More DIY Tutorials
When it comes to outfitting your home in DIY boho decor, you can’t go wrong with macrame. However, there are plenty of other ways to add boho vibes to your space. We recommend starting with the bedroom (here are a couple of fun boho bedroom ideas for you to try). After hanging your new wall hanging, you can also spruce up your walls with these different art tutorials!